Friday, February 24, 2012
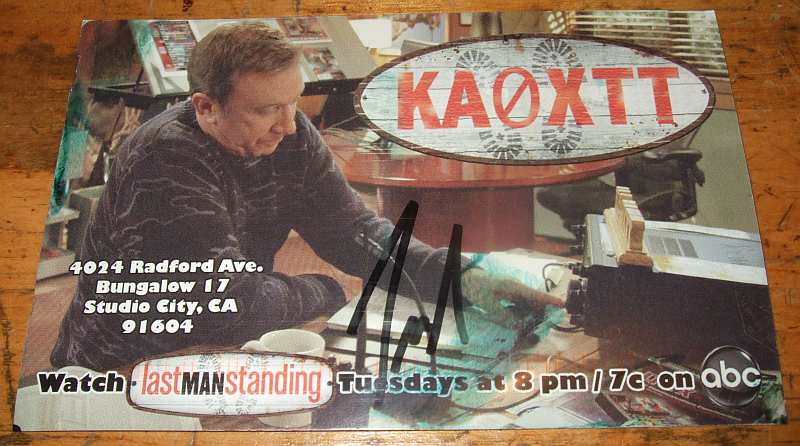
I received my Last man standing "QSL" card
I watch Last Man Standing on TV with Tim Allen. Tim's character is KA0XTT. They have a small station set up that actually works since the director is an extra class HAM. Anyhow if you send them your QSL card Tim Allen will autograph "his card" and send it to you. (NO SASE NEEDED!) It is not a real call, they made it up but it does shows up on QRZ. The call is supposed to be a Colorado call and the XTT part is an inside joke that means X T im T aylor from the old Home Improvement TV show. Just a "for fun" autographed card. Who knows your card may end up on his shack wall...

Thursday, December 29, 2011
Cad welding a tower ground system
I was asked by email to put this video back online. I made a short video showing how I connected a 2 inch wide copper strap to 16 - 8 foot ground rods forming my tower ground system. I still have all the step by step photos if anyone is interested in seeing those. (note you should wear a mask and not rely on the run for cover system)
Wednesday, December 28, 2011
New cubby holes for the boats

Picked up these used shelf units used at a great price. There are dividers in each one that are removable. A prefect place for these radios. The place is to hook them all up to run off the inverted "V". All I need is a switch, and make up a few jumpers.
Sunday, December 4, 2011
6L6 Transmitter Part 4 Finished
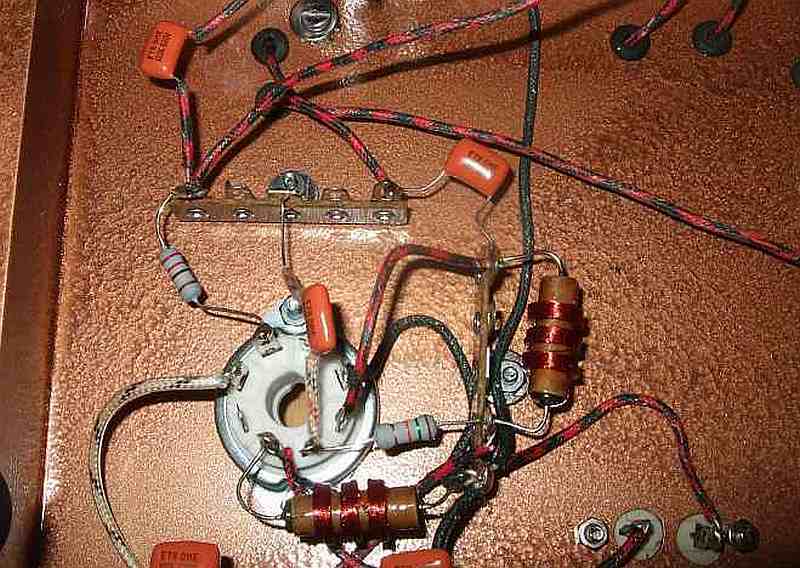
Finished up the 6L6 Transmitter project this week end. What a fun ride that was. A project like this IS a learning experience. This view shows the completed wired components looking toward the back.

This view is wired components looking toward the key jack. The Key jack ended up being faulty, so I had to swap it out with a new one. I could not figure out why I was not getting any out put from it. Elmer James found it. (good eye James) The jack had an extra part on it no doubt from someone Else's home brew project. I'll take that part off and use it for some thing else.

Finished 6L6 front side.

The back side showing the meter.

The finished pair on the bench. Power supply and Transmitter. I made a new set of Dials with bigger numbers, I think they look better.


Not too bad for an Amateur eh? A short video demo of the 6L6 Tune up.

This view is wired components looking toward the key jack. The Key jack ended up being faulty, so I had to swap it out with a new one. I could not figure out why I was not getting any out put from it. Elmer James found it. (good eye James) The jack had an extra part on it no doubt from someone Else's home brew project. I'll take that part off and use it for some thing else.
Finished 6L6 front side.

The back side showing the meter.

The finished pair on the bench. Power supply and Transmitter. I made a new set of Dials with bigger numbers, I think they look better.


Not too bad for an Amateur eh? A short video demo of the 6L6 Tune up.
Saturday, November 26, 2011
6L6 Transmitter part 3
Installed the hardware, and started wiring up the internal components.

The top side with the hard ware installed.

The front panel with meter and dial plates secured.

More to come.

The top side with the hard ware installed.

The front panel with meter and dial plates secured.

More to come.
Wednesday, November 23, 2011


Monday, November 21, 2011
6L6 Transmitter build Part 2
After getting the Dials all sorted out I started drilling holes and fitting the individual components. Anytime I build anything I like to dry fit all the parts. (old habit from 25 + years as a scientific glass blower)
I don't want to go back and re-drill holes after painting it.

This is the tool I used to drill the holes in the front panel a "Milwaukee ice" hole saw. You can buy them in the size you need or as a set. How do they work you ask? Very good, A+ in my book. It cut the 2" hole in the steel front panel easily, with a smooth finished edge. The aluminum chassis cuts were also good clean cuts.
Of course you must clamp it down before drilling.

All the parts dry fitted, adjustments made, I pulled off the protective paper from the chassis and cleaned it up with alcohol.

Nice and shiny!
Added a nice coat of primer, and I'll let it dry over night before I paint it the Copper Hammer-Tone color to match the power supply I built for it.

More to come.....
I don't want to go back and re-drill holes after painting it.

This is the tool I used to drill the holes in the front panel a "Milwaukee ice" hole saw. You can buy them in the size you need or as a set. How do they work you ask? Very good, A+ in my book. It cut the 2" hole in the steel front panel easily, with a smooth finished edge. The aluminum chassis cuts were also good clean cuts.
Of course you must clamp it down before drilling.

All the parts dry fitted, adjustments made, I pulled off the protective paper from the chassis and cleaned it up with alcohol.

Nice and shiny!
Added a nice coat of primer, and I'll let it dry over night before I paint it the Copper Hammer-Tone color to match the power supply I built for it.

More to come.....
Subscribe to:
Posts (Atom)